If you are an android user then you may notice one thing that whenever you download any files on your Android device then downloaded files get saved to downloads folder by default.
Alike other android users you also download various new android apps, latest songs, video clips and many more things, then you can imagine about the difficulty of finding any specific apps or file from downloads folder.
In this condition an idea will come in your mind that we should move all the apps or files in appropriate folders according to wish just after completing download. I really appreciate your thought, but can you tell me after each download you will always remember to move app or file into appropriate folder from downloads folder. Your answer will be surely – No.
Now, in this situation automation can be a good solution to Organize Files or Folders on Android device properly and the name “Redirect File Organizer” comes first for this action.
What is Redirect File Organizer?
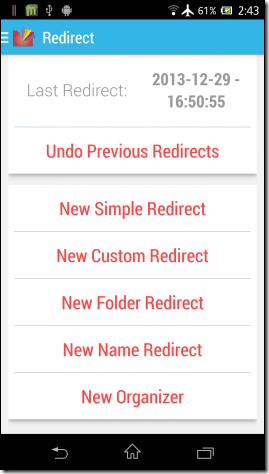
Redirect File Organizer is an Android app which has ability to automatically organize files on your Android device. The app offers five different types of automatic redirects such as Simple Redirect, Custom Redirect, Folder Redirect, Name Redirect, and Organizer. This is a so simple app and everyone can easily use on their android devices.
How to set-up Redirect File Organizer app on Android
Step (1): Firstly, install Redirect File Organizer app on your android device.
Step (2): when installation is completed, launch the app.
Step (3): After launching the app, you will see the screen as shown below. Now, you have to set-up these five automatic redirects according to your wish.
Step (4): Simple redirect offers very easy redirection for all the videos, audio and document files. So, you have to click on Simple redirect option and select the type of file which you want to redirect and the targeted folder where you want to move the files then just tap on the button of Create Simple Redirect.
Step (5): Custom Redirects provides you the option to redirect one or multiple file extensions. If you want to disengage specific folders such as the media folders of WhatsApp so that the app link is not conciliated, then you can come out with the blacklist and whitelist directories.
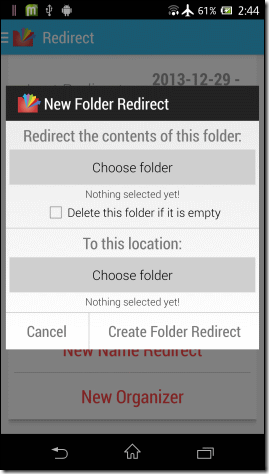
Step (6): Folder Redirect moves all the content of single folder directly to another folder. Suppose, if you want to move all the contents of Bluetooth folder from the download folder automatically then you should use this option.
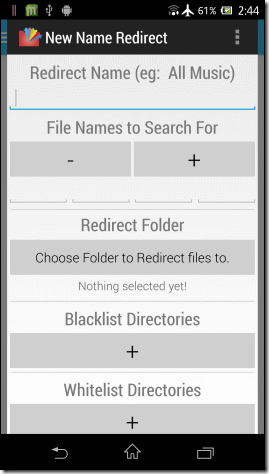
Step (7): The option of Name Redirect used for redirect files and folders of certain names in your SD card. To do you can select blacklist or whitelist directories and then the option of create the rule.
Step (8): you can use Organizer option is only for delete all the empty folders and this option is available in pro version of the app.
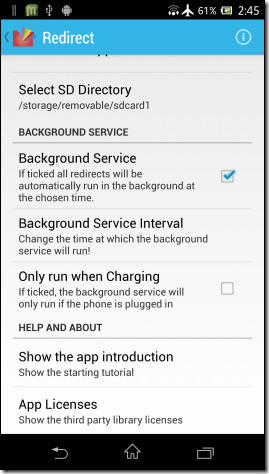
The app also allows the option of manually or background redirects. It means you can either run them manually from time to time or create a background service from the app settings.
When the app will run any redirects then you can see the progress in the notification drawer and If you want to undo any Redirects of the app then you can do by using the option of Undo Previous Redirects.
Get from here: Download Redirect File Organizer App
Overall, it can be said that Redirect File Organizer app is the best option for automatically organizing files and folders on Android devices. Many people are using this app, now it’s your turn. Give a try and share your view about this useful android app with us.
To get more useful android apps, android tips and tricks, latest updates check out our Tips for android section.


